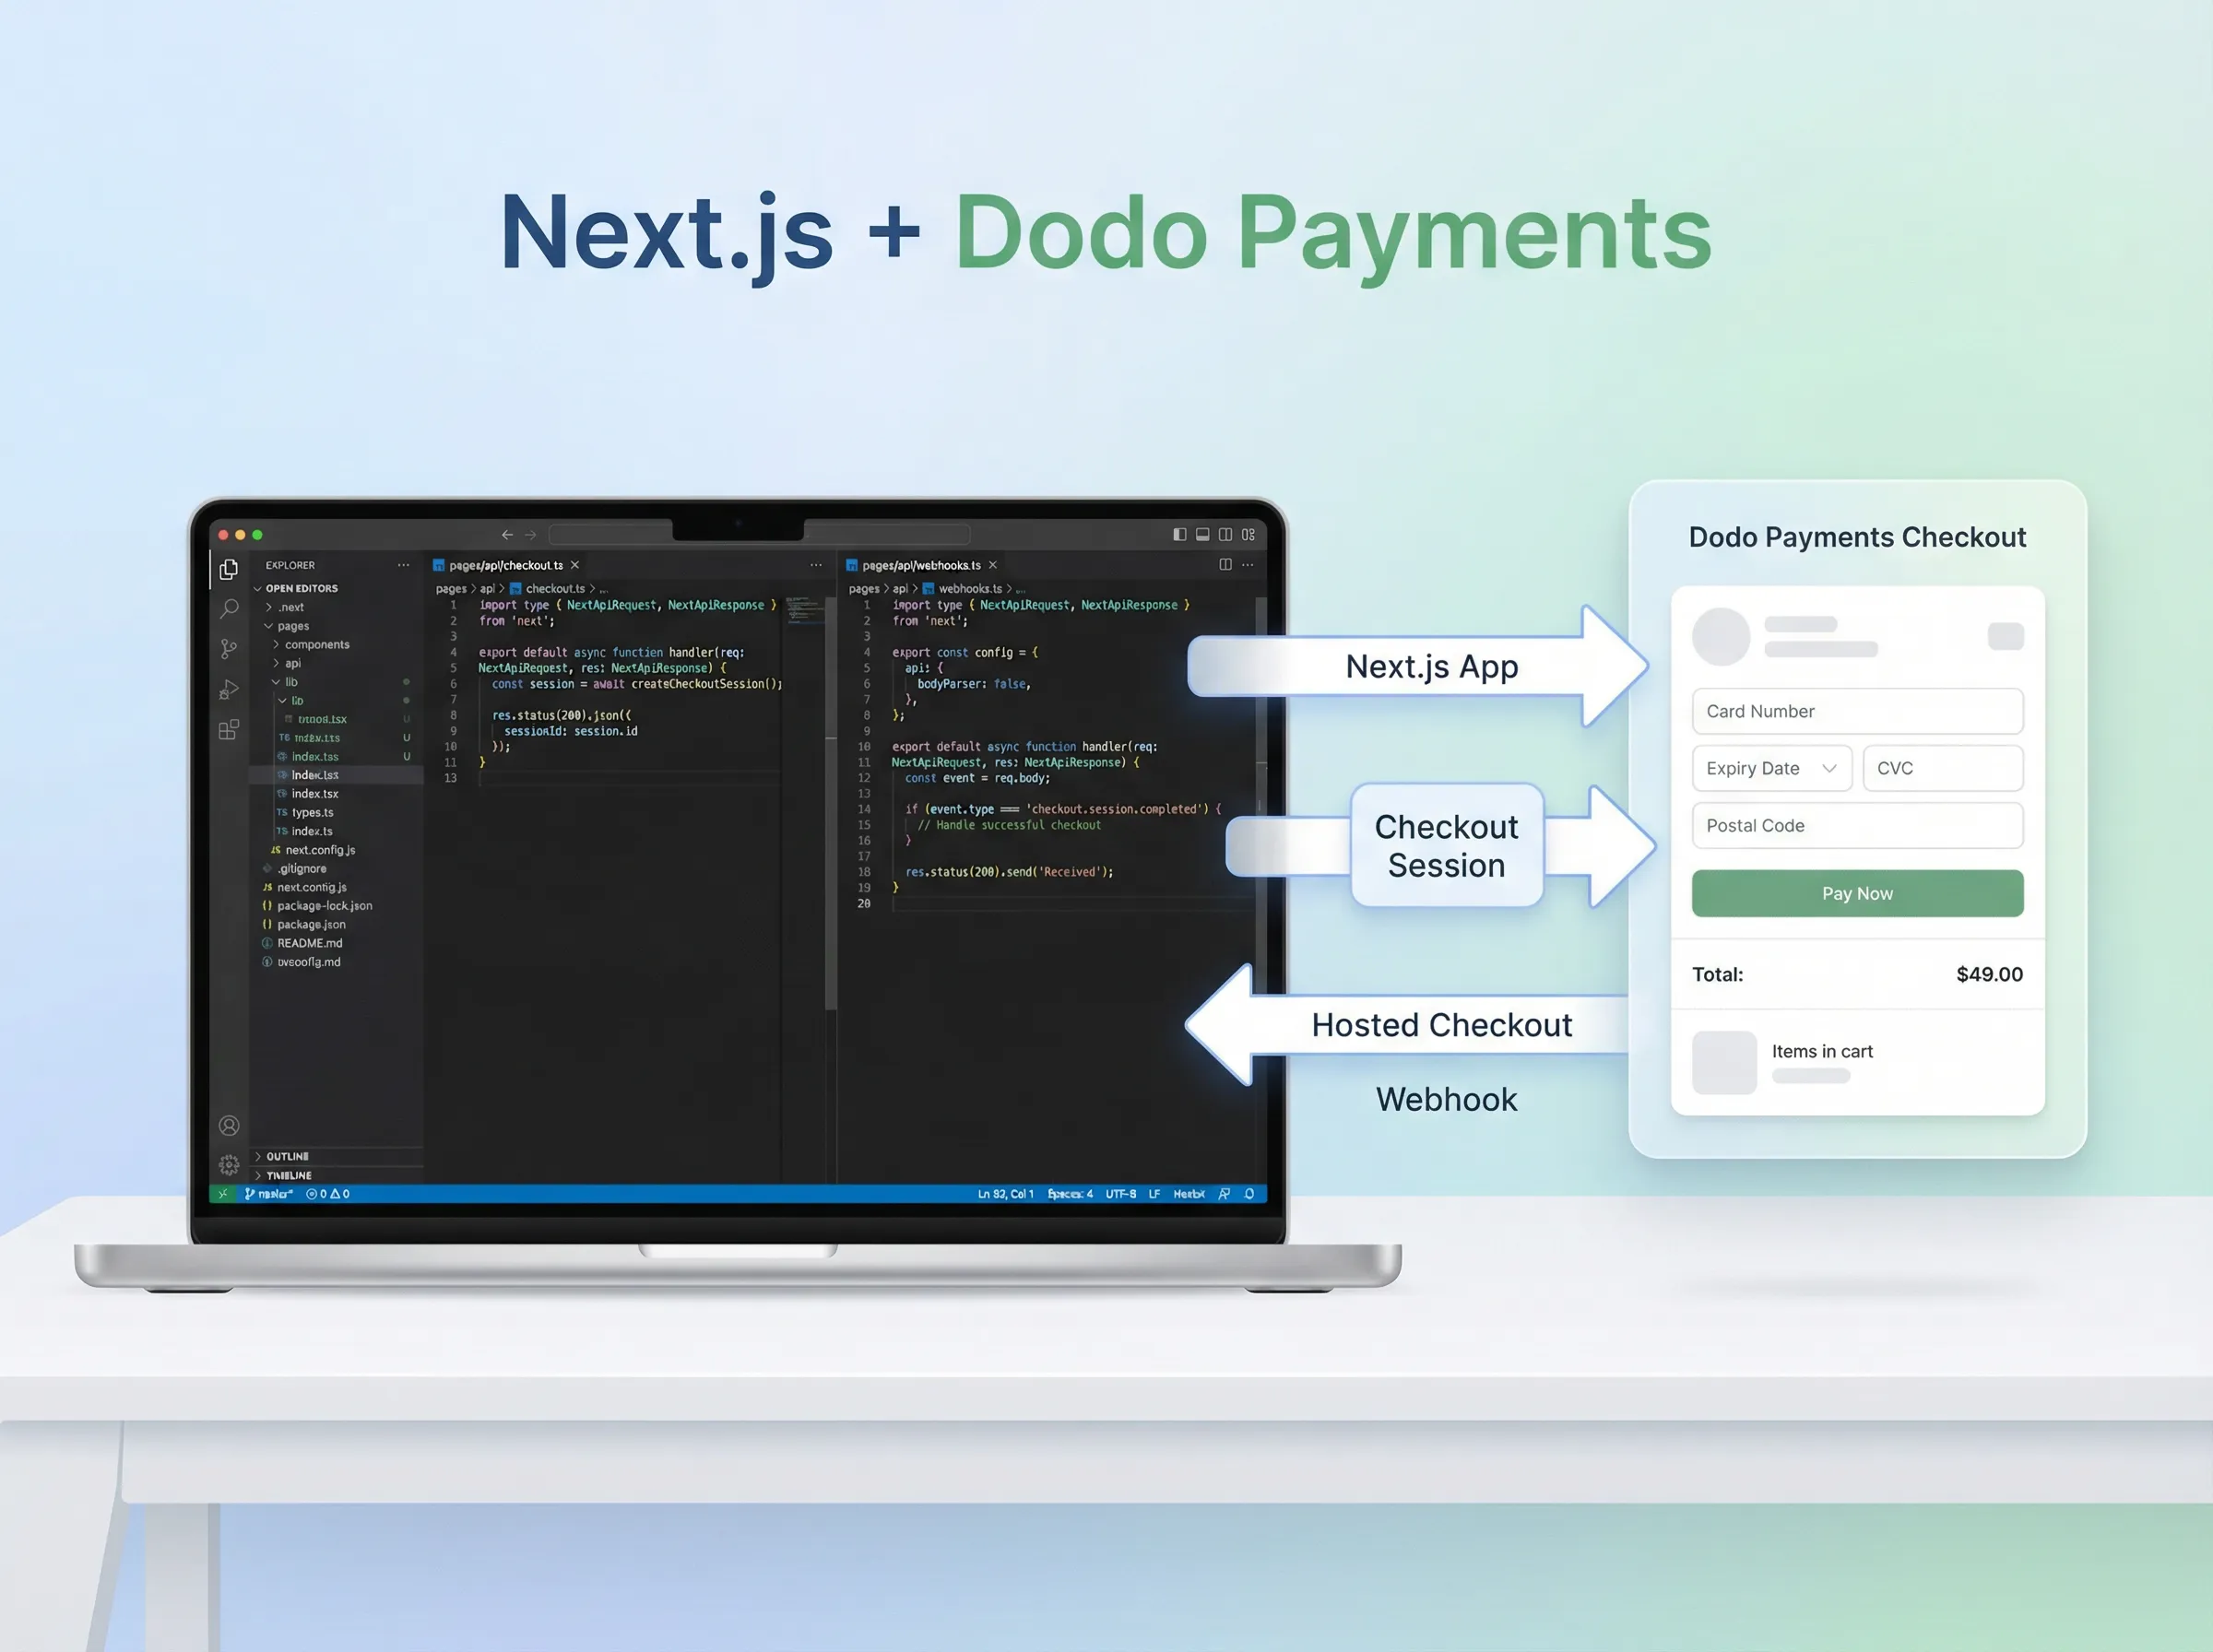
I like payments integrations that are boring.
Click button → hosted checkout → webhook confirms payment.
No fancy stuff. No “let’s build a payment UI from scratch” hero arc. Just ship.
This walkthrough is only for one-time payments. At the end, I’ll quickly point out what changes for subscriptions (spoiler: not much).
Create an Empty Next.js Project
In your terminal:
npx create-next-app@latest dodo-nextjs
cd dodo-nextjs
npm run dev
Open http://localhost:3000 and make sure it’s running.
Create a One-Time Product in Dodo Payments
Before writing code, you need a Product ID.
In the Dodo dashboard:
- Go to Products
- Create a product with one-time pricing
- Copy the product’s ID (you’ll pass this as
product_idfrom your app)
That product ID is what your checkout session will reference.
Get Your API Key and Webhook Secret
Before you can integrate, you need two things from the Dodo dashboard:
Get Your API Key
In the Dodo dashboard:
- Go to Settings → API Keys (or Developer → API Keys)
- If you don’t have one, click Create API Key
- Copy the API Key (this is your
DODO_PAYMENTS_API_KEY) - Keep this secret — never commit it to Git
Get Your Webhook Secret
For webhook verification, you need a webhook secret:
- Go to Developer → Webhooks in the Dodo dashboard
- Click Add Webhook (or Create Webhook)
- Enter a webhook URL (for now, you can use a placeholder like
https://yourdomain.com/api/webhooks/dodo) - Select the events you want to listen to (at minimum, select
payment.succeeded) - After creating the webhook, you’ll see a Webhook Secret — copy this
- This is your
DODO_PAYMENTS_WEBHOOK_SECRET
Note: If you’re testing locally, you’ll update the webhook URL later when you set up ngrok (covered in the testing section).
Install the SDK (and Svix for Webhooks)
npm install dodopayments svixDodo SDK = create checkout sessions.
Svix = verify webhook signatures (you want this).
Add Environment Variables
Create a .env.local file in the project root:
DODO_PAYMENTS_API_KEY=your_test_api_key
DODO_PAYMENTS_WEBHOOK_SECRET=your_webhook_secret
DODO_PAYMENTS_ENVIRONMENT=test_mode
NEXT_PUBLIC_APP_URL=http://localhost:3000
Notes:
- Keep API key + webhook secret server-side only.
NEXT_PUBLIC_APP_URLis used to build your return URL after checkout.
Create a Checkout Session (Server Route)
This is the piece that talks to Dodo using your secret API key.
Create: app/api/checkout/route.ts
import { NextRequest, NextResponse } from "next/server";
import DodoPayments from "dodopayments";

const client = new DodoPayments({
  bearerToken: process.env.DODO_PAYMENTS_API_KEY,
  environment: process.env.DODO_PAYMENTS_ENVIRONMENT,
});

export async function POST(req: NextRequest) {
  try {
    const { productId, email, name } = await req.json();

    const session = await client.checkoutSessions.create({
      product_cart: [{ product_id: productId, quantity: 1 }],
      customer: { email, name },

      // Keeping it simple for a starter integration.
      billing_address: {
        street: "N/A",
        city: "N/A",
        country: "US",
        zipcode: "00000",
      },

      // Dodo replaces {CHECKOUT_SESSION_ID} automatically.
      return_url: `${process.env.NEXT_PUBLIC_APP_URL}/success?session_id={CHECKOUT_SESSION_ID}`,
      confirm: true,
    });

    return NextResponse.json({
      checkout_url: session.checkout_url,
      session_id: session.session_id,
    });
  } catch (error) {
    console.error("Checkout error:", error);
    return NextResponse.json(
      { error: "Failed to create checkout" },
      { status: 500 }
    );
  }
}
What matters here:
- You send a
product_cartwith your Dodoproduct_id - You get back a
checkout_url - You redirect the user to that URL (next section)
Add a “Pay” Button That Redirects to Checkout
Create: app/components/CheckoutButton.tsx
"use client";

import { useState } from "react";

export function CheckoutButton({ productId }: { productId: string }) {
  const [loading, setLoading] = useState(false);

  const startCheckout = async () => {
    setLoading(true);
    try {
      const res = await fetch("/api/checkout", {
        method: "POST",
        headers: { "Content-Type": "application/json" },
        body: JSON.stringify({
          productId,
          email: "customer@example.com",
          name: "John Doe",
        }),
      });

      const data = await res.json();
      if (!res.ok) throw new Error(data?.error || "Checkout failed");

      window.location.href = data.checkout_url;
    } catch (err) {
      console.error(err);
      alert("Checkout failed. Check server logs.");
    } finally {
      setLoading(false);
    }
  };

  return (
    <button onClick={startCheckout} disabled={loading}>
      {loading ? "Opening checkout..." : "Pay"}
    </button>
  );
}
Yes — the email/name are hardcoded here. That’s fine for the first pass. Once the flow works, you plug in your actual user data.
Add a Minimal Success Page
Create: app/success/page.tsx
export default function SuccessPage({
  searchParams,
}: {
  searchParams: { session_id?: string };
}) {
  return (
    <main style={{ padding: 24 }}>
      <h1>Checkout started</h1>
      <p>
        Session: <code>{searchParams.session_id || "missing"}</code>
      </p>
      <p>
        This page just confirms the redirect worked. The real confirmation comes
        from webhooks.
      </p>
    </main>
  );
}
This page is not your “payment succeeded” proof. Redirects can lie. Webhooks don’t.
Add the Webhook Endpoint (Don’t Skip This)
This is how Dodo tells your server: “payment succeeded”.
Create: app/api/webhooks/dodo/route.ts
import { NextRequest, NextResponse } from "next/server";
import { Webhook } from "svix";

const webhookSecret = process.env.DODO_PAYMENTS_WEBHOOK_SECRET!;

export async function POST(req: NextRequest) {
  try {
    // Use raw body text for signature verification
    const payload = await req.text();
    const headers = Object.fromEntries(req.headers);

    const webhook = new Webhook(webhookSecret);
    const event = webhook.verify(payload, headers);

    // Reply quickly
    const response = NextResponse.json({ received: true });

    // Handle event in the background
    handleWebhookEvent(event).catch(console.error);

    return response;
  } catch (error) {
    console.error("Webhook verification failed:", error);
    return NextResponse.json({ error: "Invalid signature" }, { status: 401 });
  }
}

async function handleWebhookEvent(event: any) {
  switch (event.type) {
    case "payment.succeeded":
      console.log("Payment succeeded:", event.data);
      // Do whatever your app needs here (unlock access, send email, etc.)
      break;

    default:
      console.log("Unhandled event:", event.type);
  }
}
Two important details:
- Signature verification is the whole point (don’t accept random POSTs)
- You verify using the raw request body (
req.text()), not parsed JSON
Test Locally (Webhooks Included)
Your laptop can’t receive webhooks directly, so you need a tunnel.
Use ngrok:
ngrok http 3000You’ll get a public URL like:
https://xyz-123.ngrok.ioIn the Dodo dashboard:
- Go to Developer → Webhooks
- Add a webhook URL:
https://xyz-123.ngrok.io/api/webhooks/dodo - Select at least the payment event(s) you need (start with
payment.succeeded) - Copy the webhook secret into .env.local as
DODO_PAYMENTS_WEBHOOK_SECRET
Then trigger a test event from the dashboard and watch your terminal logs.
Test Mode Cards (Quick Checkout Testing)
In test mode, you can use these common test card numbers:
- Visa: 4242 4242 4242 4242
- Mastercard: 5555 5555 5555 4444
- Amex: 3782 822463 10005
Use any future expiry and any CVC.
Going Live
When you’re ready for real payments:
- Replace your test API key with your live API key
- Replace your webhook secret with the live webhook secret
- Switch environment to
live_mode - Update
NEXT_PUBLIC_APP_URLto your real domain
DODO_PAYMENTS_ENVIRONMENT=live_mode
NEXT_PUBLIC_APP_URL=https://yourdomain.com
Using the Same Flow for Subscriptions (Quick Note)
If later you create a subscription-based product in Dodo, the integration pattern stays the same:
- you still create a checkout session
- you still redirect to hosted checkout
- you still rely on webhooks
The main difference is: you’ll listen to subscription-related events in your webhook handler too.
That’s it.
If you’re new to TypeScript with React/Next.js, I wrote a practical TypeScript + React guide that covers typed props, hooks, context, and API calls. And if you need to serve your Next.js app from a subdirectory on your root domain, here’s how to do it with Cloudflare Workers + Vercel.